 
|
|
|
The Faster Payments Builder is used to create ‘small’ single or bulk Faster Payments without needing to import a separate payment file.
When using the Payment Builder a user manually keys in payment information and builds up an overall payment file. Payments are individually validated in the same way as importing a payment file - as is the submission as a whole.
The Payment Builder is useful for smaller submissions but is not designed for larger submissions containing many payments.
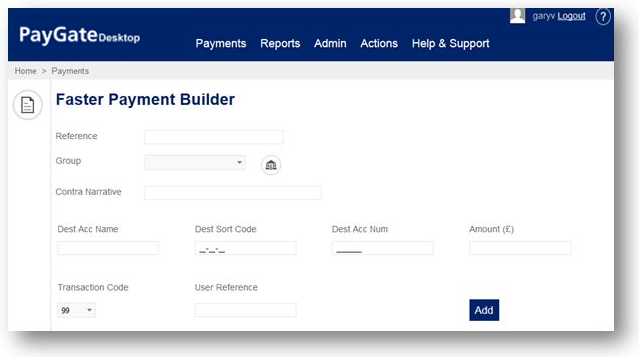
Reference
Start by giving the submission a reference. This can be up to 18 characters long and is used by you and your colleagues to identify the submission during submission workflow and reporting.
You should give the submission a straight forward and easily identifiable name such as ‘Jan 14 Payroll’
Setting a Group
In PayGate all payments are made within a group. Before you can create your payment you must choose a group from the group selector. The selector contains all of the groups that you are currently a member of.
Setting a Contra Narrative
You can optionally set a contra narrative using the textbox marked contra. This field can be up to 18 characters long.
If the contra record is left blank then PayGate will use the ‘Originating Account Name’ field of the group’s account. You can view this field by hovering over the bank icon next to the Group selector. Hovering over the icon will display the group details inspector that includes useful group information including the Originating Account Name.
Adding payments
To add a payment to the submission complete the following fields:
Click the button marked ‘Add’ to add the payment to the submission.
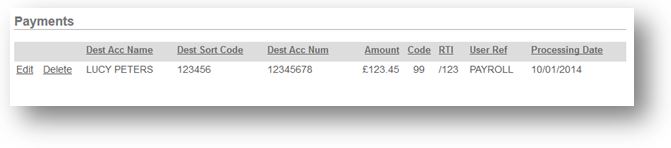
As you add payments to the submission they will be viewable
in the Payments Grid.
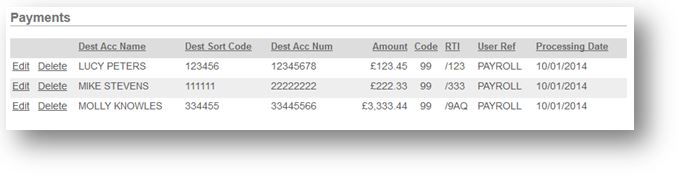
If required add more payments to the submission by repeating the previous steps.
Editing / Amending payments

Depending on your group rights you may be able to amending payments that have been added to the submission. To edit a payment click the ‘Edit’ link to the left of the payment line of the payment grid. Note: this link will be hidden if your group configuration does not allow you to edit payments.
Clicking ‘Edit’ will take you into Edit Payment Mode. The payment line will turn green indicating Edit Payment Mode. In this mode you can edit the payment items. Depending on your browser version. you may need to scroll right to reach some of the fields.
When you have finished editing the payment, click ‘Update’
the save the changes. If you have previously validated the payments then
the submission will need to re-validated.
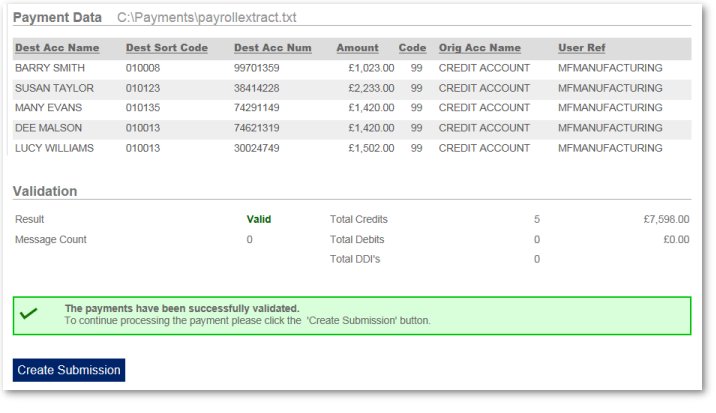
Step 3 - Validate the Payments
The payment data is now loaded into PayGate but before we can create a submission file and send it to Faster Payments we must validate the payments. Payment validation searches through the imported payment data and runs a series of tests and rules against the data to ensure the payment will be able to be processed without error.
Among the tests run are:
Validation is mandatory and cannot be skipped or circumvented.
Validation Results
During validation am individual payment can produce one of three results.
Result
Description
Pass
No
problems found with the payment instruction
Warning
Validation has issued a warning. Users should
inspect the warning to determine if there is a problem with the payment
Fix
An error has been
found and the submission cannot proceed until the error has been corrected.
if validation passes then you will see a Green results bar and can proceed straight to step 4.
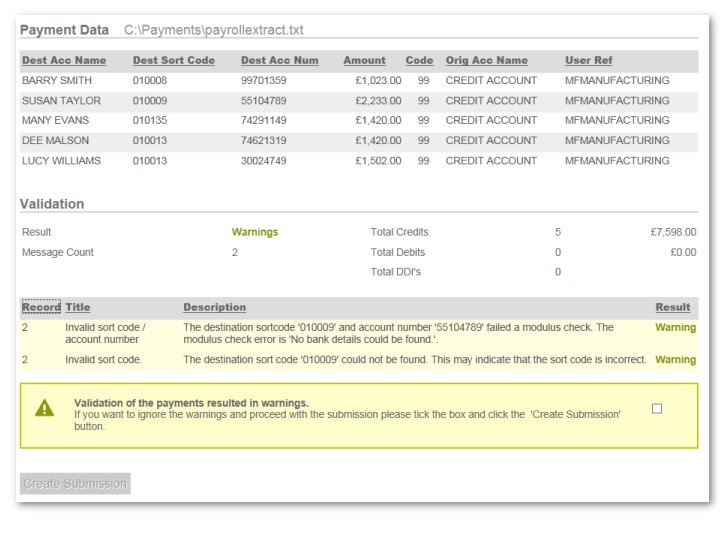
Payments that contains Warnings
If validation results in warnings then you should read each validation result to determine if the submission should proceed. If necessary remove or edit any incorrect payments and rerun validation.
If you wish to continue with the submission despite the warnings then you must tell PayGate that you accept the warning(s). Tick the Accept Warning box and proceed to Step 4.
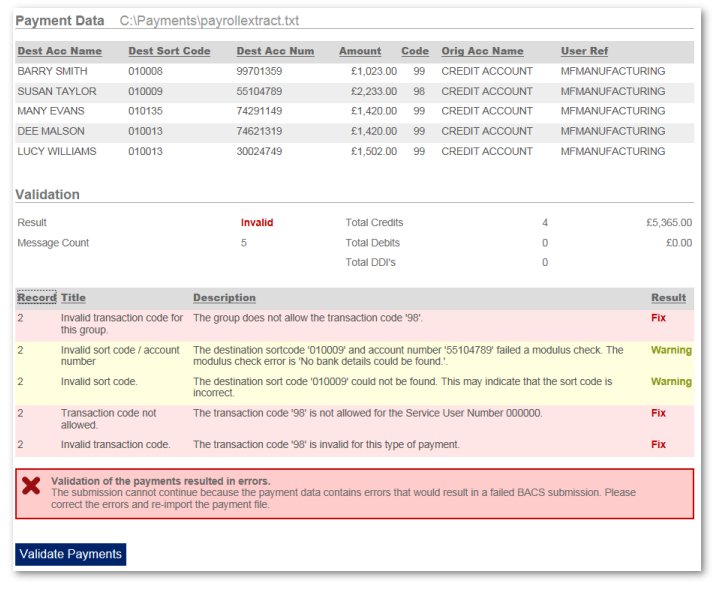
Payments that contain Errors (Fixes)
An instruction marked as ‘Fix’ will definitely fail further along the submission. If the validation results contain fixes (Errors) then you must either remove or correct the invalid payments before proceeding.
Step 4 - Create the Submission
Click the button marked 'Create Submission. PayGate Desktop will format the payments into a Faster Payments ready file and issue action requests to the members of the group that can sign the payment file.
The Creation stage of the submission work has now been completed.
|
©Copyright 2016 Ultra Electronics Limited . |