Note: Creating a SEPA mapping is a necessarily in-depth task. You should be reasonably familiar with SEPA and SEPA files in order to use and follow this section. If required, CORVID PayGate's technical consultants can help create a mapping for you. |
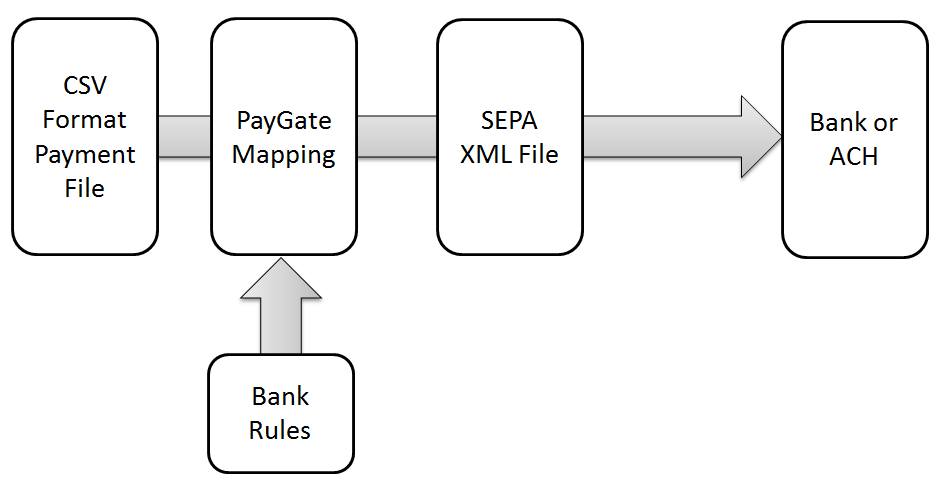
The first part of setting up SEPA in PayGate is to create a mapping. A mapping has two important functions:
PayGate Designer
PayGate mappings are created in the PayGate Designer application. This is a standalone Windows application that connects to the PayGate cloud over a secure, encrypted web link.

Determining the final file format
PayGate can create SEPA Payment files in almost any format in use today. The file format that banks or clearing houses normally require is an ISO20022 PAIN (PAyment INitiation). PAIN files are large and complex XML files that must be created exactly right in order to be successfully processed. PayGate can create a valid PAIN file from a different format such as a fixed length or CSV format file.
The first piece of information that is needed are details of the format that your bank requires. Your bank will have provided you with a format specification for SEPA. You will use that document to help create the mapping.
Creating the mapping.
We will now create a new PayGate mapping that will be used to create the SEPA file formatted files that you bank requires. In this example we have a payment file in the commonly used CSV format.
Firstly we will add the CSV file to the mapping using a delimited connector. Start the PayGate Designer and ensure you have a blank mapping available.
Locate the Csv node in the Tools Pane. Mapping > Connectors > Text Files > Csv
Double click the node or drag it onto the blank mapping surface.
The 'Delimited Test File' windows will be displayed.
We now want to browse to the CSV file we are using. So that the mapping will work properly when exported to PayGate Cloud the CSV file should be placed somewhere within the C:\Paygate\pgwfrtv\[customerid] directory.
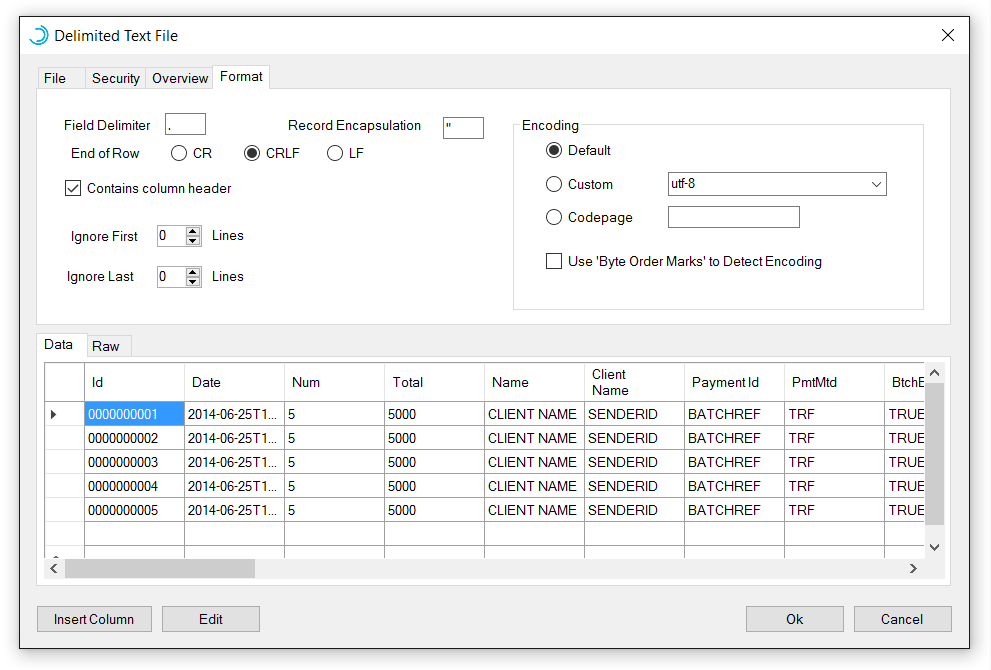
Click 'Ok' to create the connector in the mapping.
Now we want to tell PayGate about the bank format that we need it to create, In this example, my bank, 'OmniBank' has provided me with a pdf file that explains how to create a SEPA file. They want the file to be in a file format called PAIN.001.001.03.
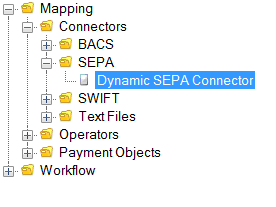
In the PayGate Designer find the 'Dynamic SEPA Connector' node in the tools panel. Mapping > Connectors > SEPA > Dynamic SEPA Connector
Double click or drag the node onto the mapping surface. This will open the Dynamic SEPA Connector configuration window.
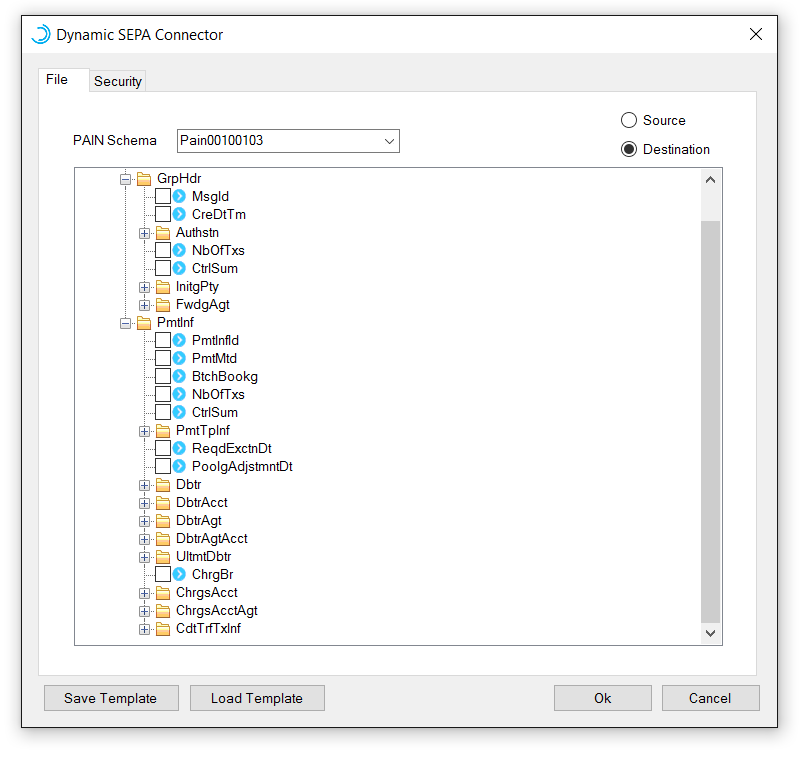
In the PAIN Schema combo box. Ensure PAIN.001.001.03 is selected. This matches the type of format that the bank is asking for.
Also ensure that 'Destination' is selected in the top right of the window. Select it if it is not.
We now want to select the fields of the PAIN format that Omni Bank requires. For example the Omnibank specification says they require
Nm to be completed in the GrpHdr (Group Header) section. Find the Nm node in the main tree and tick the entry. Do this for all of the filed that the bank requires so that you end up with a tree with multiple ticks.
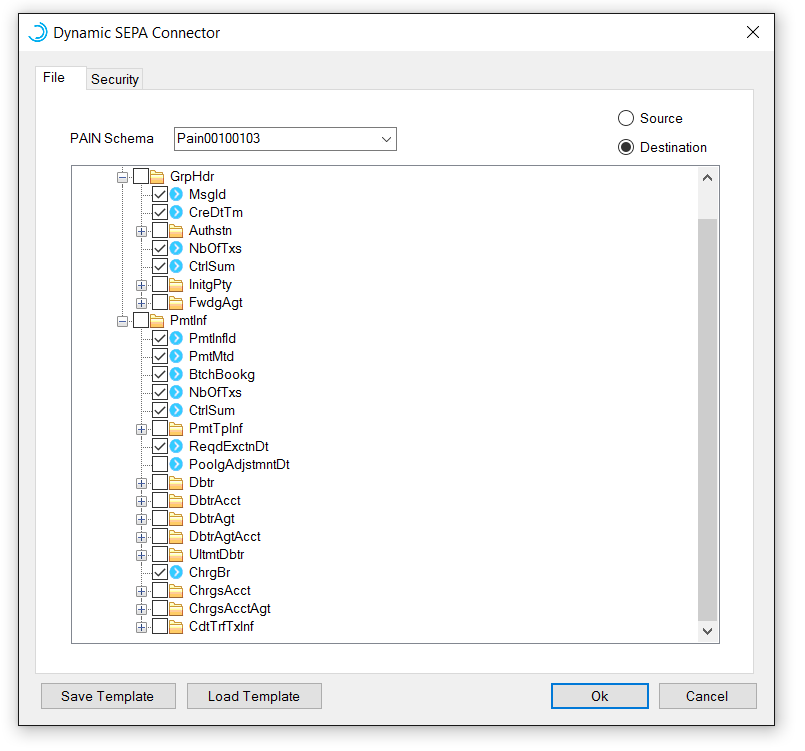
When you have completed this section and ticked all of the entries required you can save it as a template (see below) or click Ok.
Clicking Ok creates the Dynamic SEPA Node in the mapping.
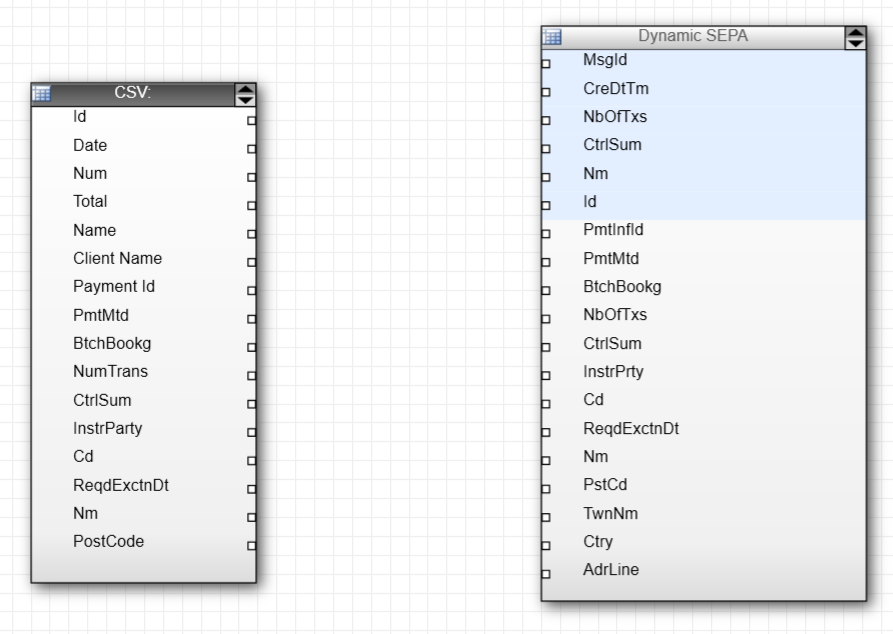
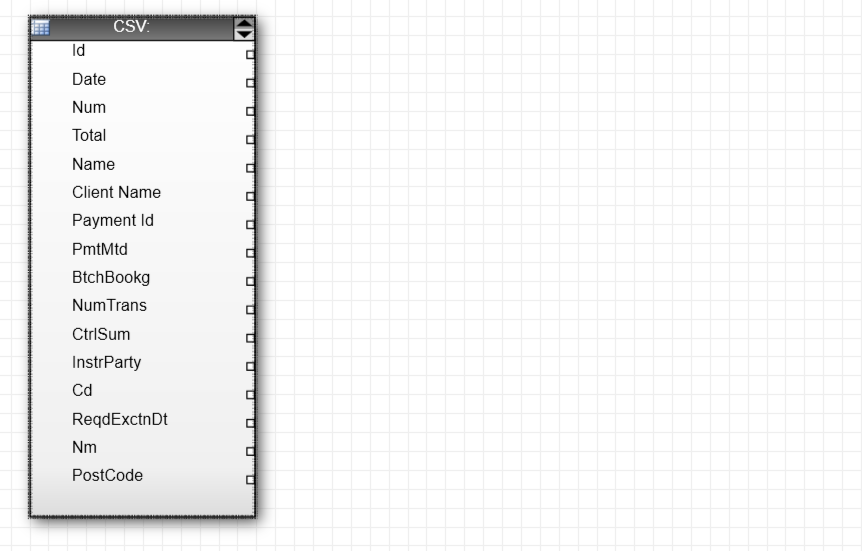
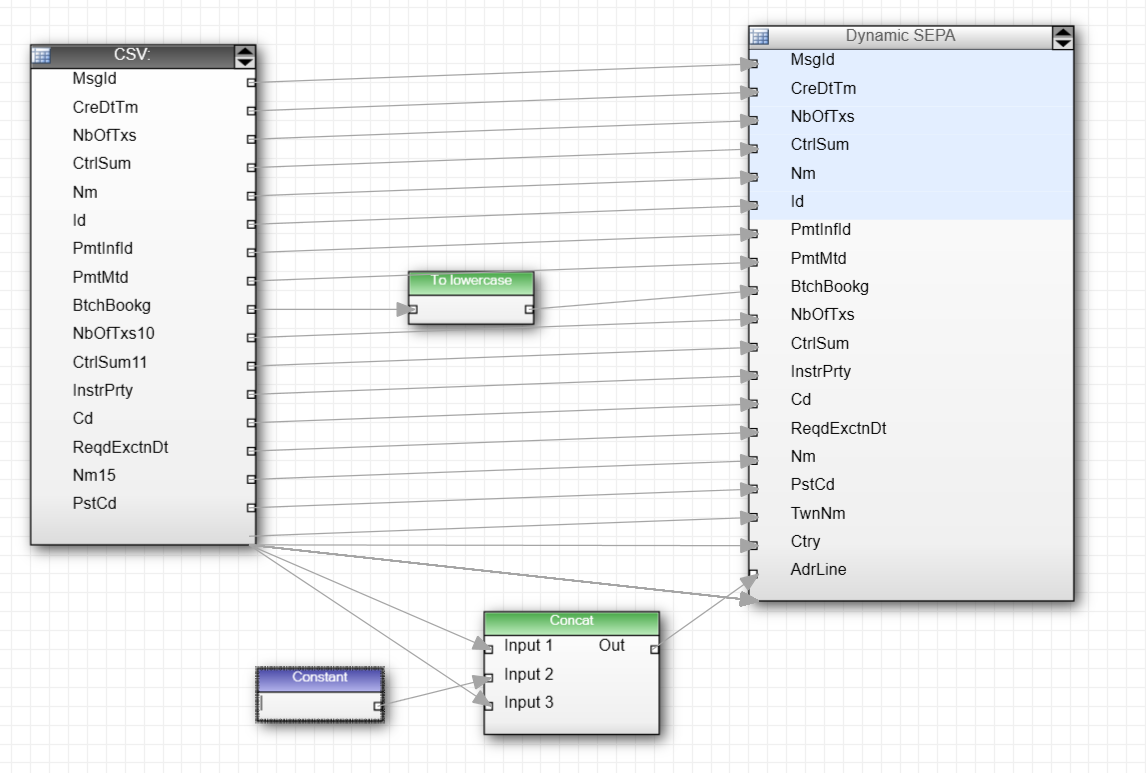
Now we need to connect the fields in our CSV file to the fields in the SEPA connector. For example, the ID field in my CSV file if the MsgId (Message Id) field in the SEPA file. Therefore I connect Id or MsgId:
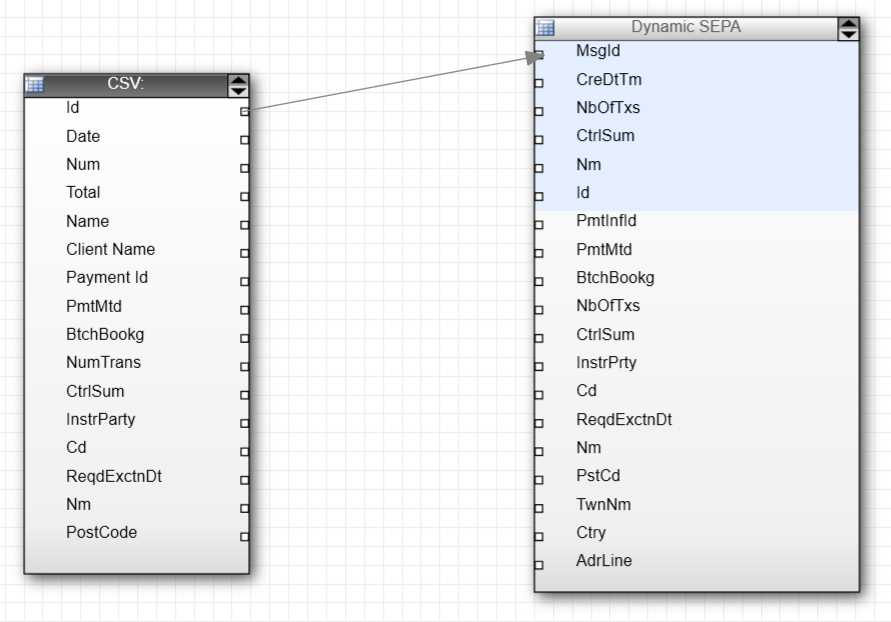
I continue mapping each item in my CSV file to an item in the Dynamic SEPA connector. I can use all of the functionality of mapping to create my mapping such as transforming dates into a different format. In my mapping a used a ToLowercase node to convert a string of text to lower case. I also used a concat node to concatenate two address lines into a single line.
Finally I save my mapping for safe keeping. I can run the mapping at any time in sandbox mode to check that the mapping to converting my CSV data correctly.
Click the 'Run Sandbox' button in the toolbar to immediately see how the mapping is working.
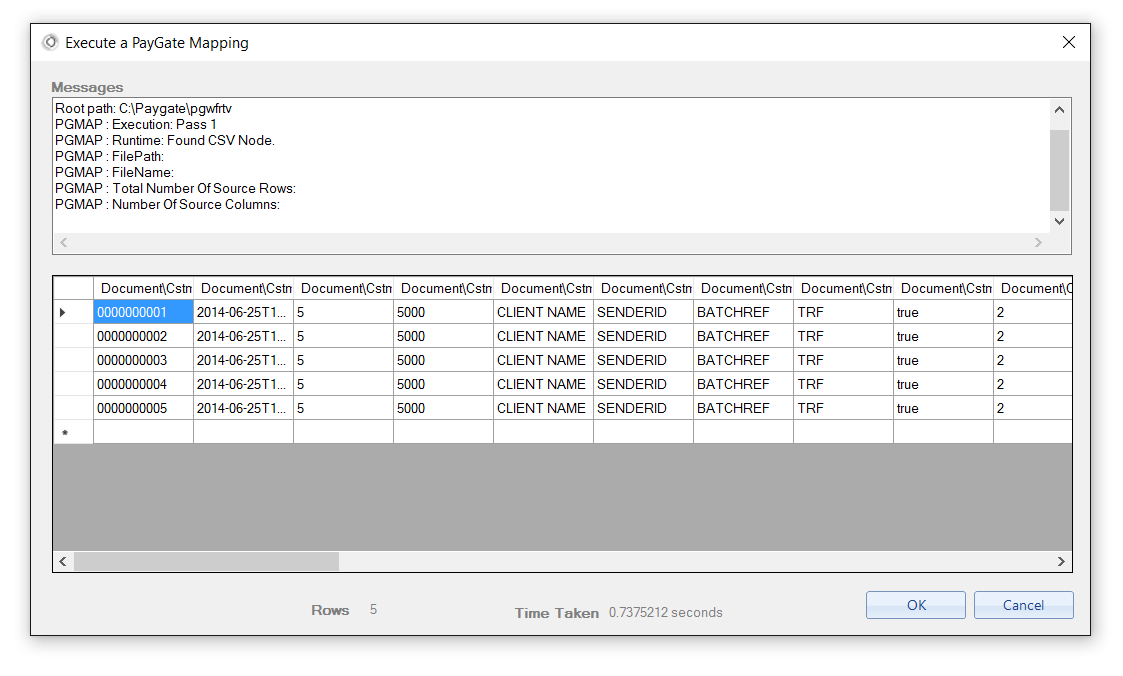
In this case I can see that the mapping to working correctly and I am ready to export the mapping to PayGate Enterprise.
From the main menu, click File > Export > Export to PayGate. Complete the details and click 'Export to PayGate'. This will securely send the mapping to PayGate Cloud so that it is available for use in a PayGate SEPA Group.
Templates
Templates allow you to save the state of a SEPA Dynamic Node. You can reload saved templates and re-use them in different mappings. This means once you have created a SEPA connector for a particular bank, you can re0use the configuration in other mapping without have to recreate the dynamic configuration.