You can manage your own users provided you have permission to edit and delete existing users.
Provided you have permission to edit existing users, clicking the "Admin - Manage Users" menu option
displays the page shown below.
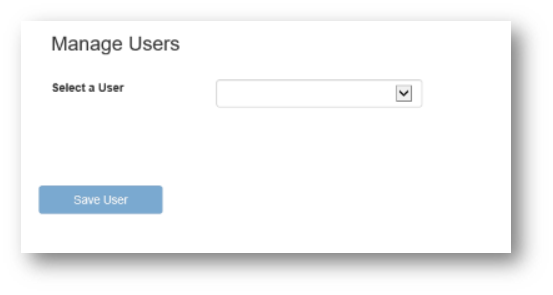
Select a user from the dropdown combo box to edit that user's details.
Editing A User
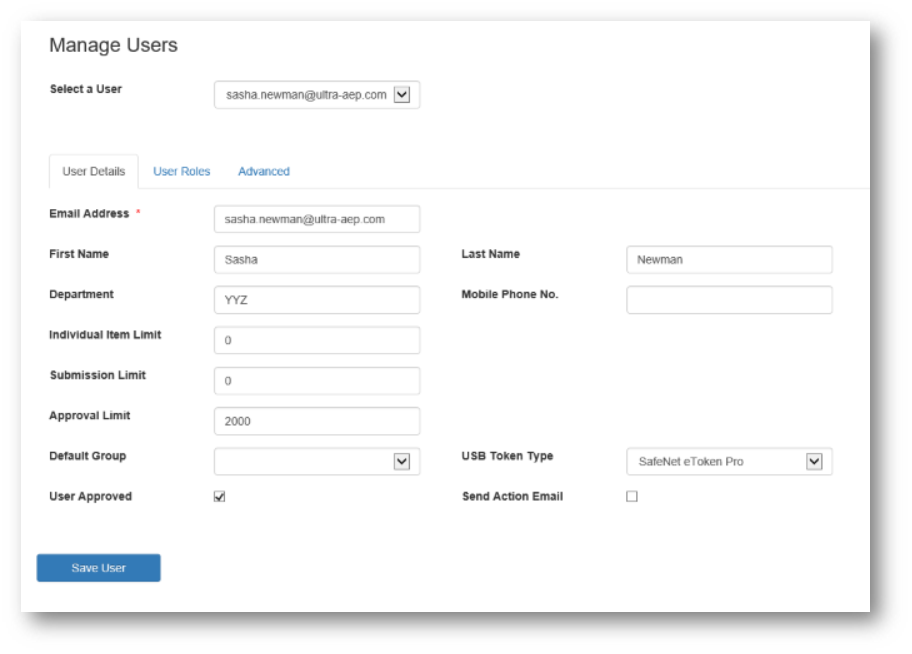
Select a user from the dropdown combo box to show their details as shown below.
User Details
Email Address
Mandatory field which should match the username when a new user is created.
First Name
Optional field showing the user's first name.
Last Name
Optional field showing the user's last name.
Department
Optional field showing the user's department.
Mobile Phone No.
This is required if a user will be requesting security codes via SMS to approve a payment.
Individual Item Limit
PayGate can limit the amount of an individual payment item this user can process when creating a new submission.
Set to a default of £0 means there is no limit for an individual item up to the BACS and Faster Payment limits of
£20 million and £100,000 respectively.
Submission Limit
PayGate can limit the maximum amount of an entire submission which this user can create.
Set to a default of £0 means there is no limit.
Default Group
Only those groups where the selected user has the "Create" role will be listed in this dropdown. You can optionally select a default group for a user.
This means that when they create a new submission this default group will be selected automatically.
This can be changed if needed.
USB Token Type
If your users commit payments using a USB token then the type of token must be selected.
The default value is "None" since not everyone will use a USB token.
The "SafeNet eToken Pro" is a blue plastic USB token.
The "Gemalto SEG" is a chunky black USB token.
Send Action Email
When this is selected, the user will receive an email informing them when they have an action which requires their attention.
User Approved
The default setting is to have this selected. When de-selected the user won't be able to login to PayGateOnline.
One reason to de-select this would be if a user has changed department on a temporary basis so isn't allowed to use PayGateOnline for a while.
NB. If a user has left your company permanently then you should just delete the user.
User Roles
Clicking on the "User Roles" tab allows you to assign or remove roles to or from a user.
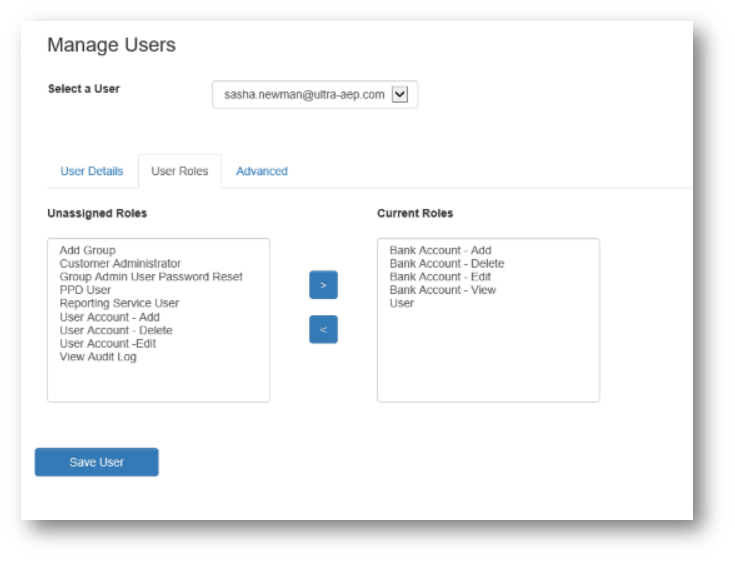
Unassigned Roles
These are the roles which can still be assigned to a user.
To add roles to a user, select one or more unassigned roles and click the ">" button.
The selected roles will move from "Unassigned Roles" to "Current Roles".
Current Roles
These are the roles which are assigned to a user.
To remove roles from a user, select one or more current roles and click the "<" button.
The selected roles will move from "Current Roles" to "Unassigned Roles".
Advanced Options
Click the "Advanced" tab to access the advanced options as shown below.
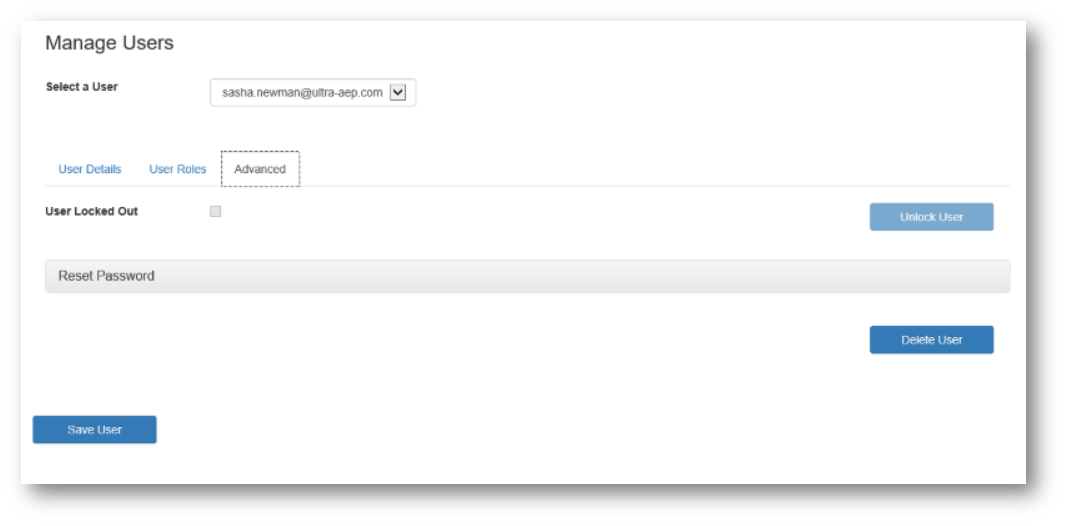
User Locked Out / Unlock User
A user can lock themselves out of PayGate by attempting to login using the wrong password 5 times.
When this happens this checkbox will be selected and the "Unlock User" button will be enabled.
Clicking the "Unlock User" button will unlock the user; the button will then become disabled while the checkbox will no longer be ticked.
Reset Login Password
Clicking on "Reset Login Password" expands the section enabling the user's password to be reset.
The screenshot below shows the expanded password reset section.
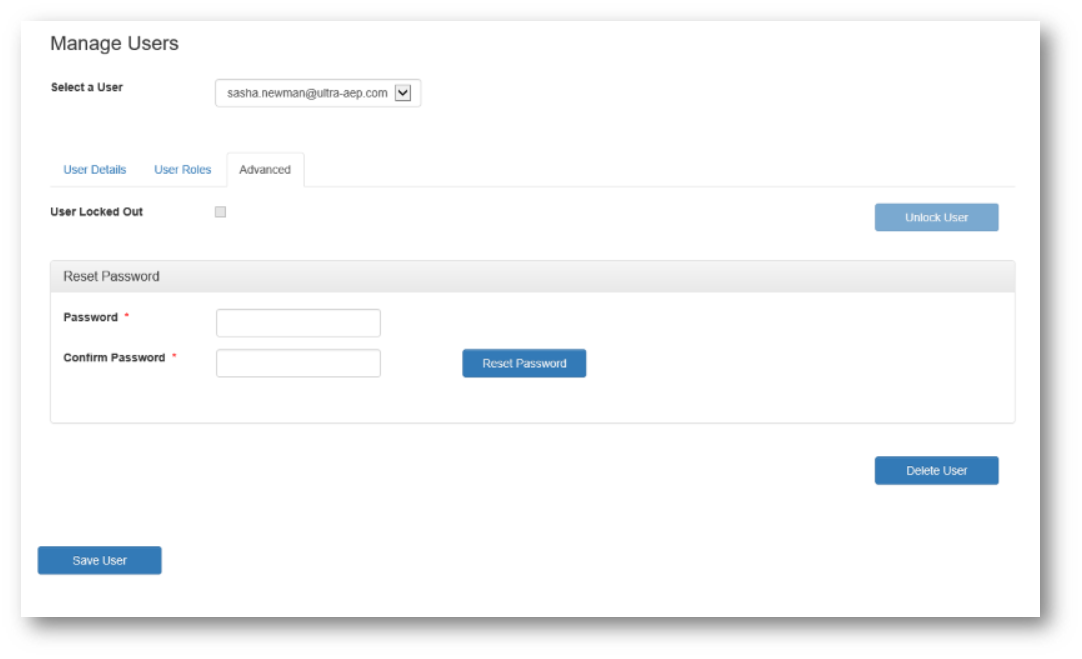
Enter the new password and confirm the new password.
Click "Reset Password" to change the user's password.
The message, "Password successfully reset." will be shown if the password was changed otherwise an error message will be shown.
Delete User
If you have the "DeleteUserAccount" role then the "Delete User" button will be enabled; otherwise you cannot delete a user.
Clicking the "Delete User" button will show an "Are you sure" confirmation pop-up window allowing you to cancel the user deletion.
Save User
Click the "Save User" button to save any changes.
If the save is successful the confirmation message "User account changes have been saved." will be displayed at the top of the page.